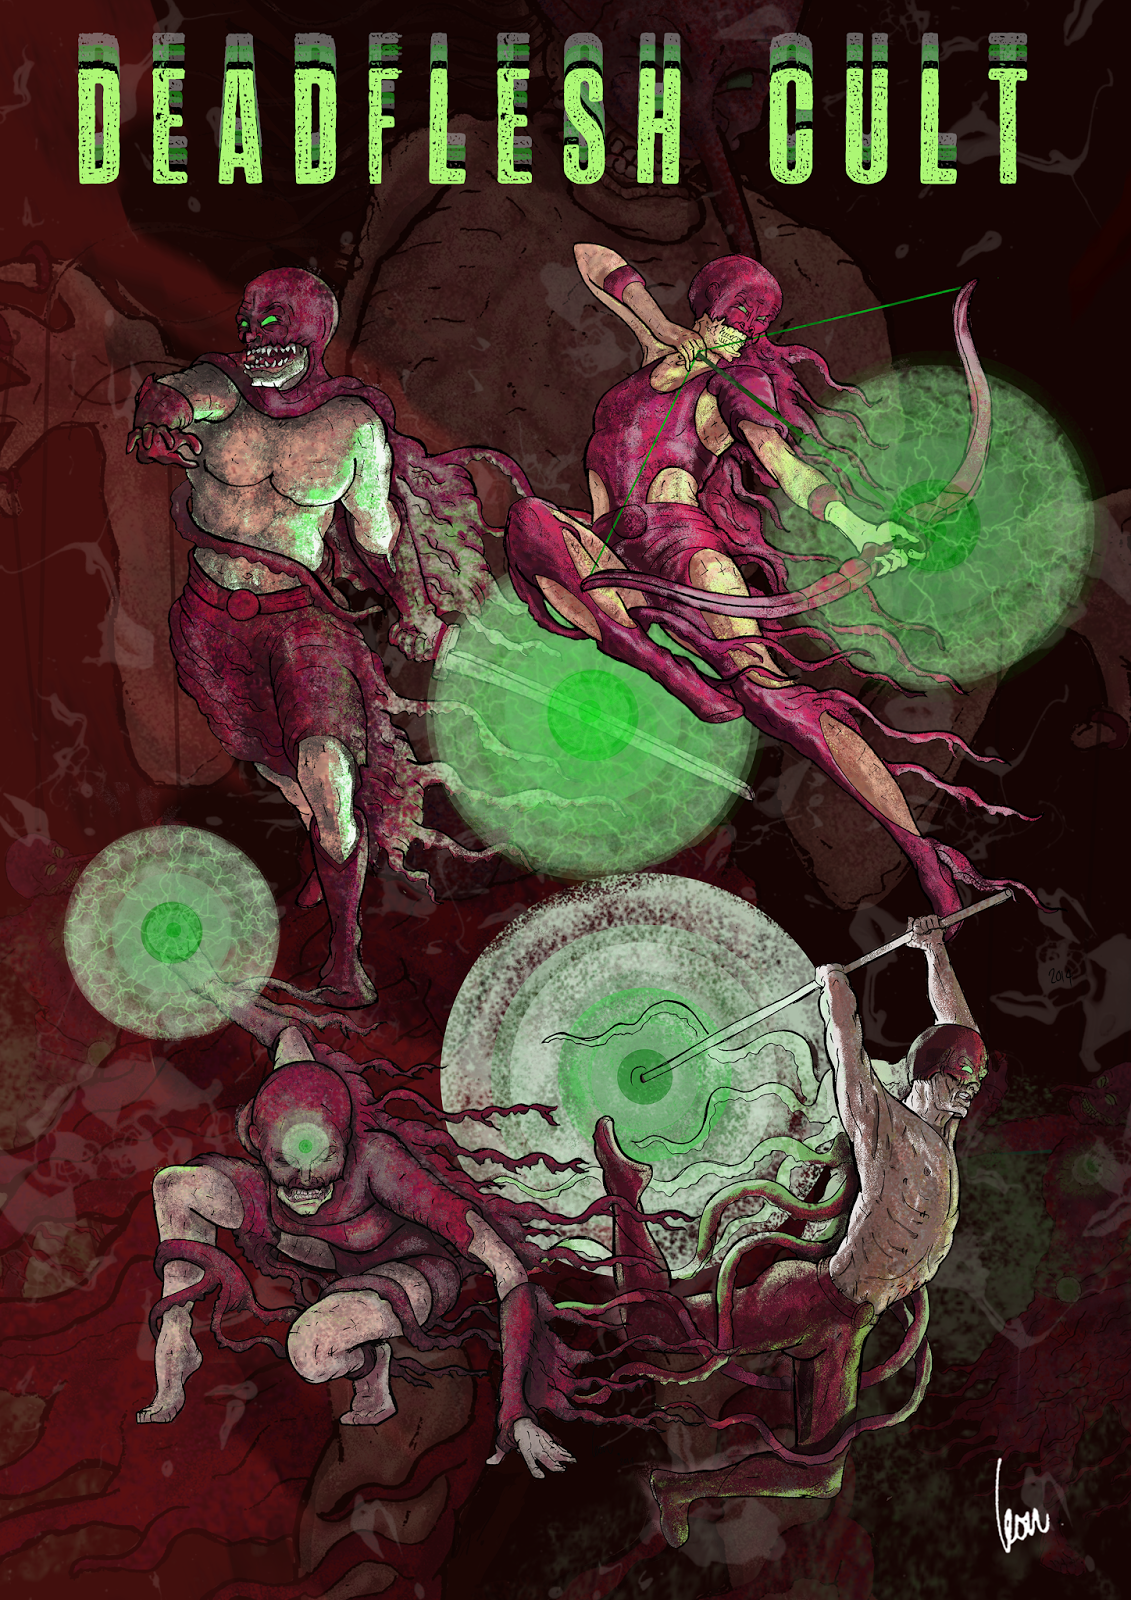
DEADFLEASH CULT - It is armor, It gives them life, it gives them a face.
This is a concept idea and exercise I made for myself based on a few areas I have wanted to work on over the past 12 months. Linework, keeping my clean lines with the pencil crisp and no compromise and time not taken to be happy, but happy with the speed and process I have made to suit me. It was mainly critiquing myself with the skills I had obtained and trusting my judgment. After studying Animation, Illustration, Design, Concept designs, Character and Background design and some storyboarding. These are the things I am most passionate about. I love concept and design. All of it. Pre-production is my jams, I dig it. I get excited. So...
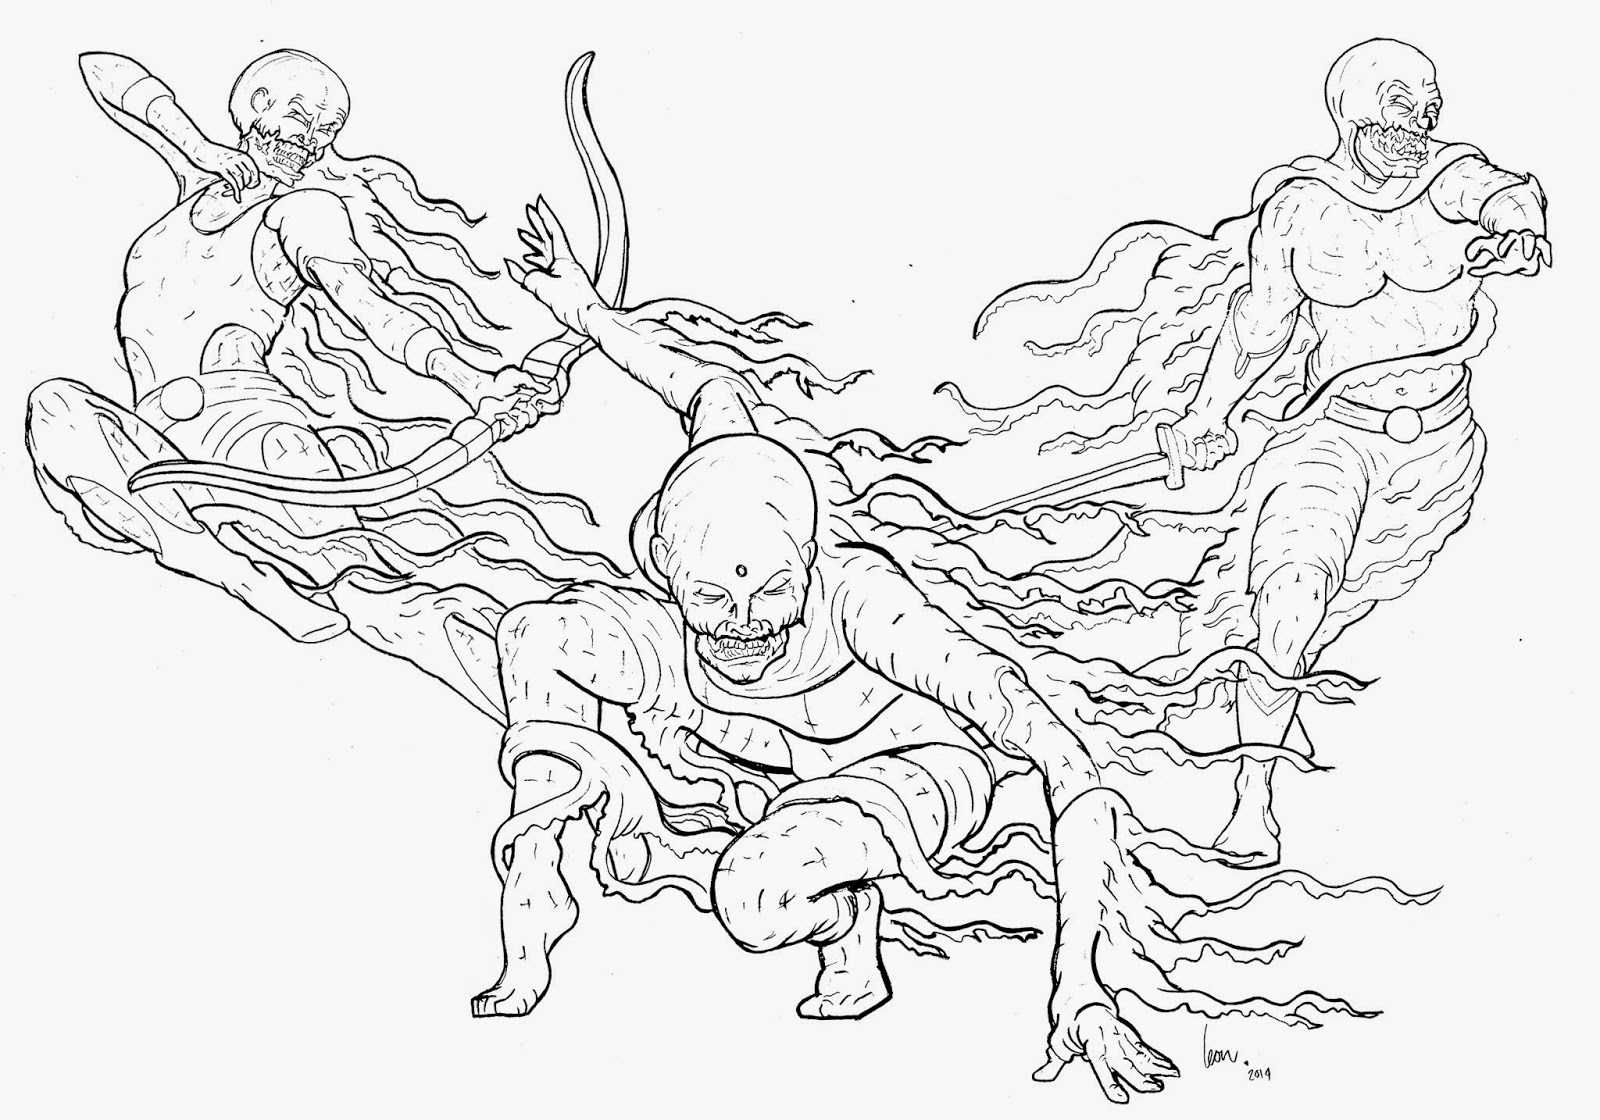
This was for, four years you have many concepts and ideas busting in your skull but cultivating and brewing just enough. The members of the DEADFLEASH CULT live wrapped in flesh and it breaths around them it resembles tentacles with a fire like ripple. It is armor, It gives them life, it gives them a face.
Here is a poster I put together all five members.
(left to right, top to bottom)
Malice the Executioner
Arrow of Abboherence
The Ninja of Vehemence
Shinobi Assassin
The Puppet Sorcerer
(in background)
I rough out the pencil work and pose 3-4 time before I am 100% happy with :
1) The pose - A pose must tell a story, I love a good story. Mystery. Even in my sweetest of drawings
2) Overall clothing - What are they wearing? How and where will items sit?
3) Extra details of items - This is deciding the final destination of where a lot of things will sit
4) Clean up - It is challenging, but once in the right mind set its fun.
I do all these steps together to keep my energy up, with this last three.

Get a rough skin tone down. Then work on the texture to give it a skin, comic book easy colour.

Erase all that you don't need and add some more pigments.

I like to then duplicate the layers and adjust the huyes so they all come out the same colour. Then like with the skin I erase what I don't need. Adding the orbs (single layer to get the light source in place.

Adjust colours using RGB colours to suit.

I started on Shinobi Assassin to get the overall feel.

Posed in action below:


Thank you for checking out my art. I like to keep my journal of how I progress and am also writing these notes for myself. I am not the master. I am forever the student. Always learning. Always sharing.
Mr Leon Taylor