Mr Leon Taylor - Artist

My photo
Auckland, None, New Zealand
I am Mr Leon Taylor Artist/ Illustrator / Designer/ Character Animator / Musician . I work for myself as a freelance artist. I am open for commissions and collaborations, contact mrleontaylor@gmail.com I post my creation process and experience here. https://twitter.com/#!/mrleontaylor , http://www.soundcloud.com/mrleontaylor , http://www.tumblr.com/blog/mrleontaylor

Mr Leon Taylor's - Blog Archive

Showing posts with label concept design. Show all posts

Tuesday, 6 September 2016

2029 - Church of Skulls


2029 - CHURCH OF SKULLS

This is a concept and idea I have been working on for a few years and this will be where I will share stories and updates on my development with the personal project. Here is the first image of my idea turned in to a graphic novel style. Below we can see a naked female and she is strong and in control, she fears nothing and nothing will stop her from her mission. The man you can see is a pleb and at the will of the female as are all males in 2029 - Church of Skulls. Why? What is in the females sack? who is in the Cabin? Why is the female naked? Where are we?

Church of Skulls has character motives and story that is messed up with a shocking twist.
This has been a fun project to work on over the years and can not wait to work on the first pages over the next 24 months.


original Pencil Drawing "Female"
Original Pencil Drawing "Background"


Original Pencil Drawing "Background"


Screen Shots of basic colour and lighting (WIP) 


Wednesday, 2 March 2016

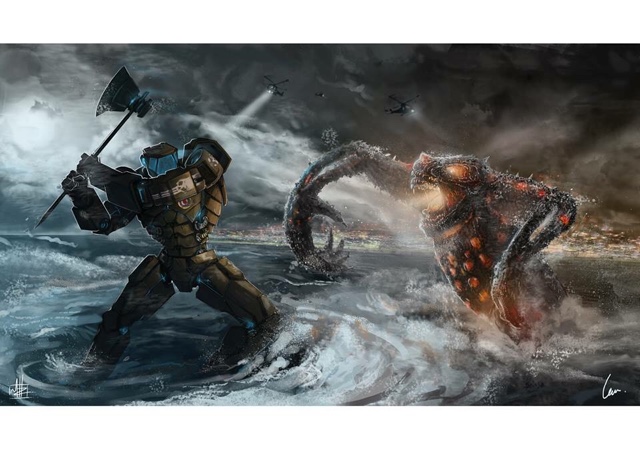
KAIJU vs JAGER - Pacific Rim Fan-Art 2015 - BACKGROUND PROCESS


This was a collaboration by Me ( Mr Leon Taylor) and Matt Haworth for the Event Overload NZ
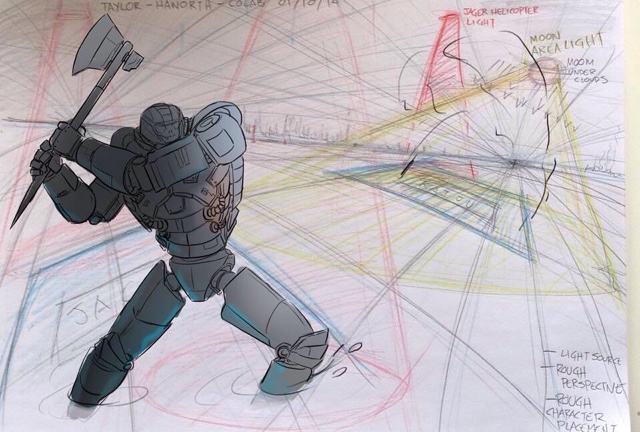
I put together a rough compostion of the area with the background and Kaiju, that I later sent to Matt and who later roughed in the Jager in before we decided on the composition. I wanted to make mine aggressive as possible and charging at the Jager after he had made his way through the city.

KAIJU vs JAGER - Pacific Rim Fan-Art 2015
Below is the finished piece, to follow is the rough and process I have taken through the collaboration. 


The rough Design and composition I drew up, that Matt Haworth later inserted his WW2 style Jager.


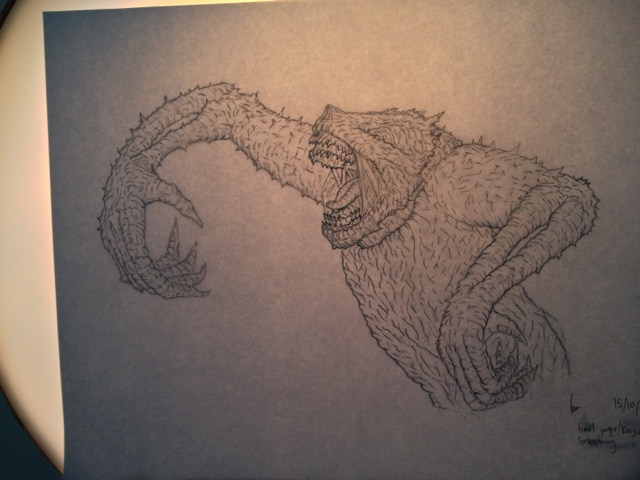
The First pieces of Line-work for the huge Kaju vs the Photoshopped Coloured Version with light bounce and elements be fore adding to the background.


 MR LEON TAYLOR

- BACKGROUND PROCESS-

1)Get the prespective ready and general landscape.


2) Add inn intial light  and lights in city.


3) Map out the distruction from where the Kaju has come from and add moon and background lightining.


4) Work on clouds and light source and smoke over the city.


5) Add the cold vs warm tones to match Characters and add contrast to the battle.


6) Clean up city area make it feel like it has more depth and a shore line give the clouds more volume.


7)  Burn that city down, make it feel like terror has been and that it is about to colapse and add movement in the ocean where the Jager and Kaju will be.


8) Add the rays of light that will be hitiing our characters.

9) Insert Kaju and then look work with Matt on a final composition.

This was a great challenge and I got so much from it. I live to collaborate and especially with people who have a similar background and love to finishing projects.

Monday, 4 May 2015

SEMIOTIC CUBISM - VERSION 1.0 - HORROR MOVIES

 The power of true cinema made by masterminds. These colours and shape will mean something to you. It is a powerful place and can influence the mind for good and bad. Never underestimate the power of your own brain, it is truly amazing.

THE SHINING


HALLOWEEN
CHILDSPLAY


FRIDAY 13th


HELRAISER


THANKS FOR CHECKING OUT MY BLOG!

Mr Leon Taylor

The Twisted Holy slate pit: Creation process - Visual Diary -7 major steps

Mr Leon Taylor

The Twisted Holy slate pit:


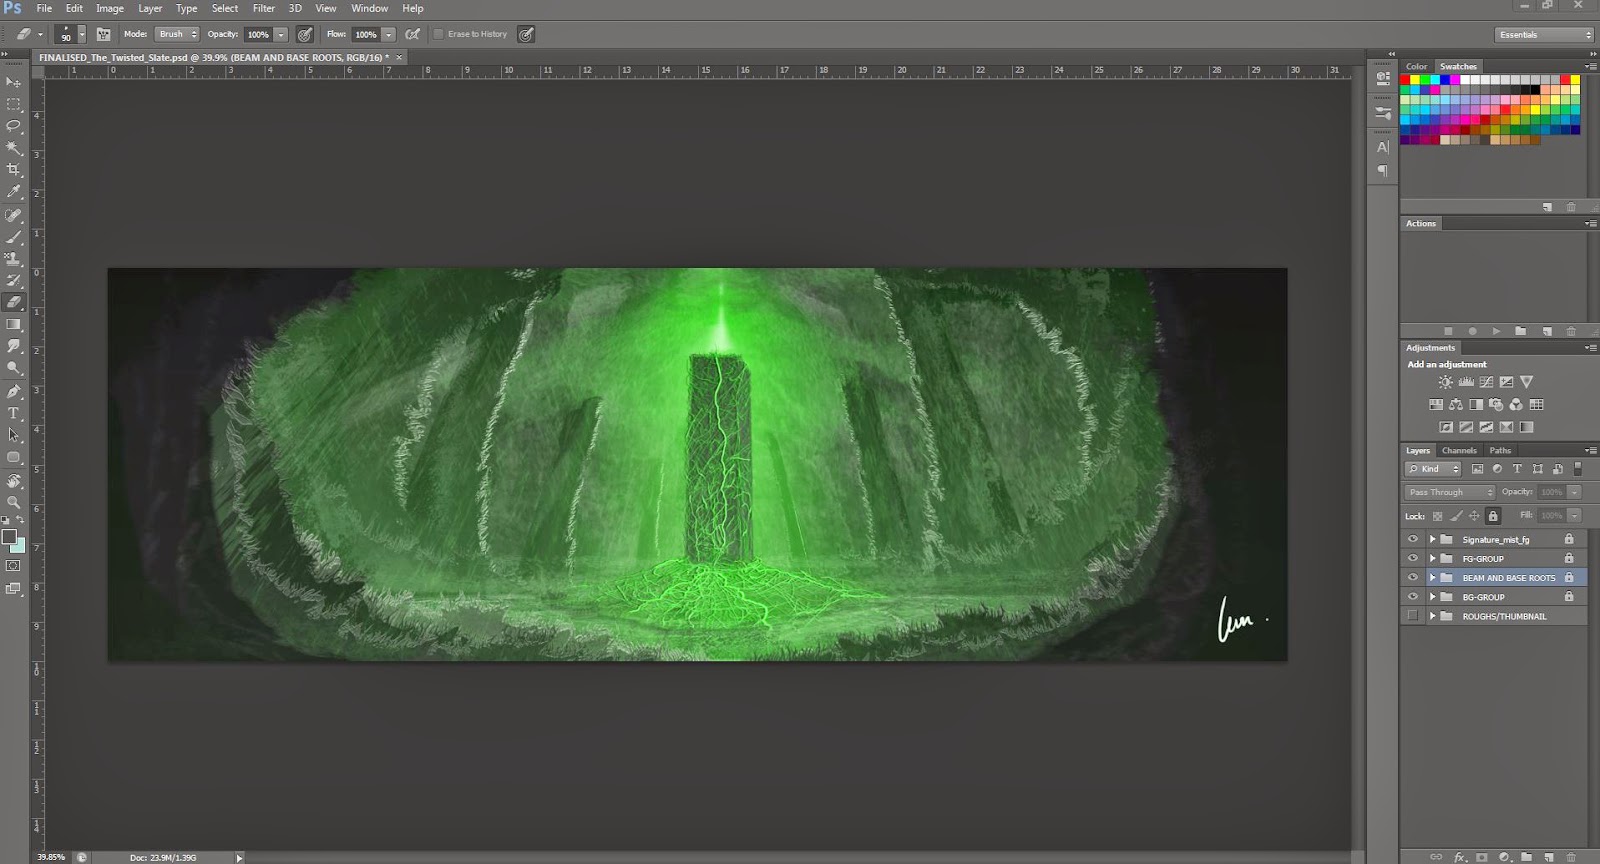
Concept art/ Game art/ Album artwork : I wanted to challenge myself doing more underworld painting. All are based on a number of thumbnails I drew one morning that I had to get out of my head. The most exciting part is texturing them. Thumbnails are quick and help get the light source sorted. I tried to stick to a more simple colour palette compared to ' Eternal rotting root of Doom '. But making it feel more Alien, but just as organic

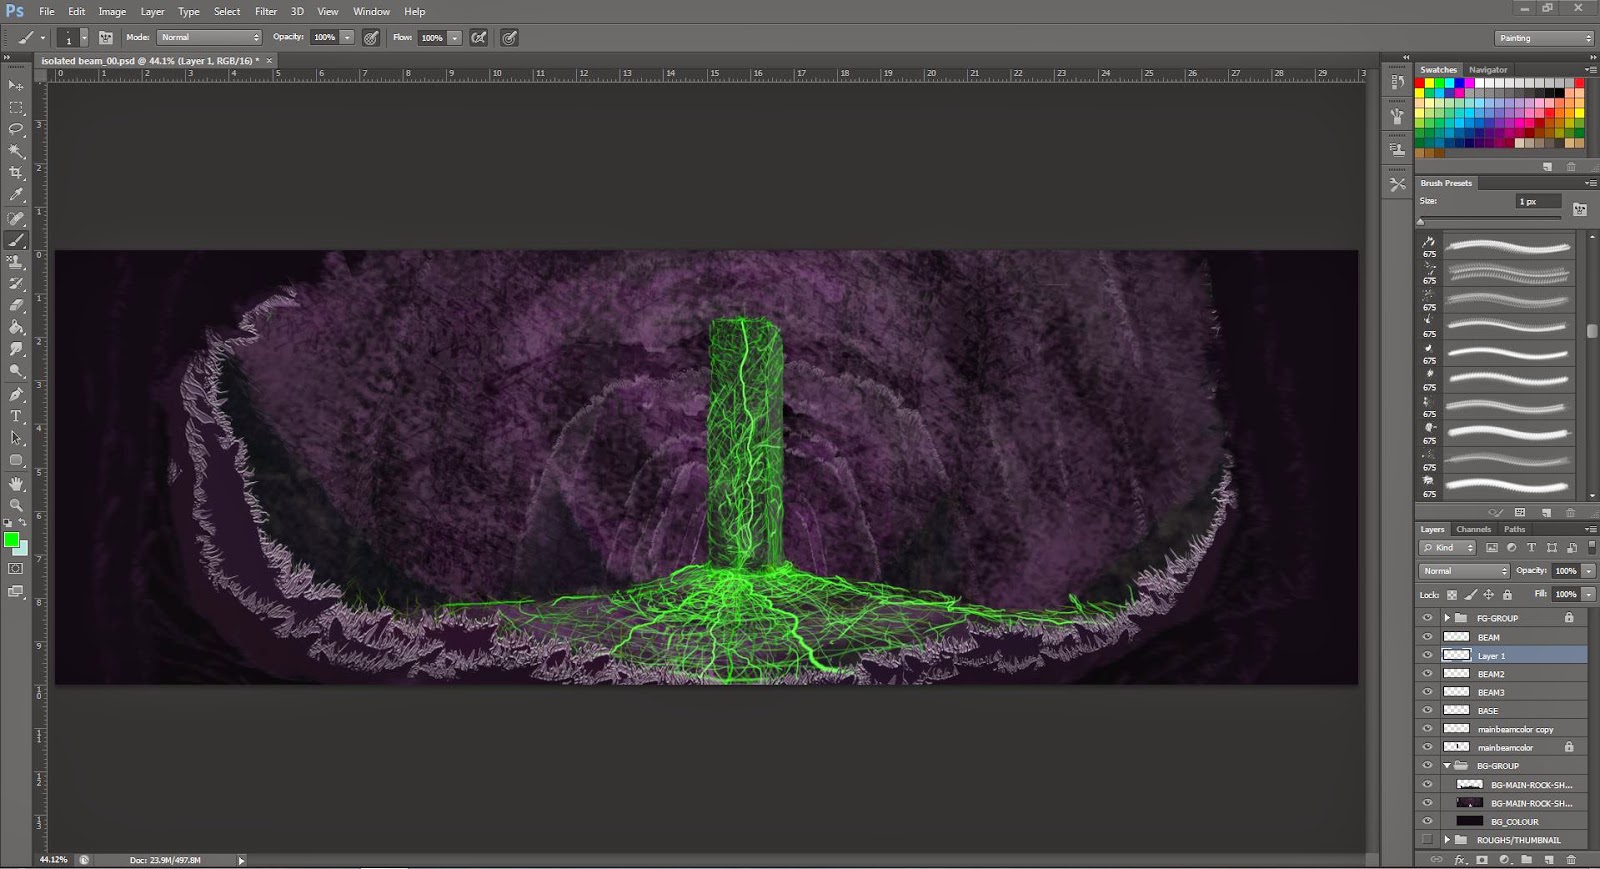
1) Thumbnail - and made in layers to know what layer I am texturing BG, FG MG.


2) I then start cutting out the pieces I need from my thumbnail sketch and throw some coulor and texture with photoshop brushes. Then rough out the root that will climb the slate.


3) Worked on the lightsource more, fine details, added some textures.


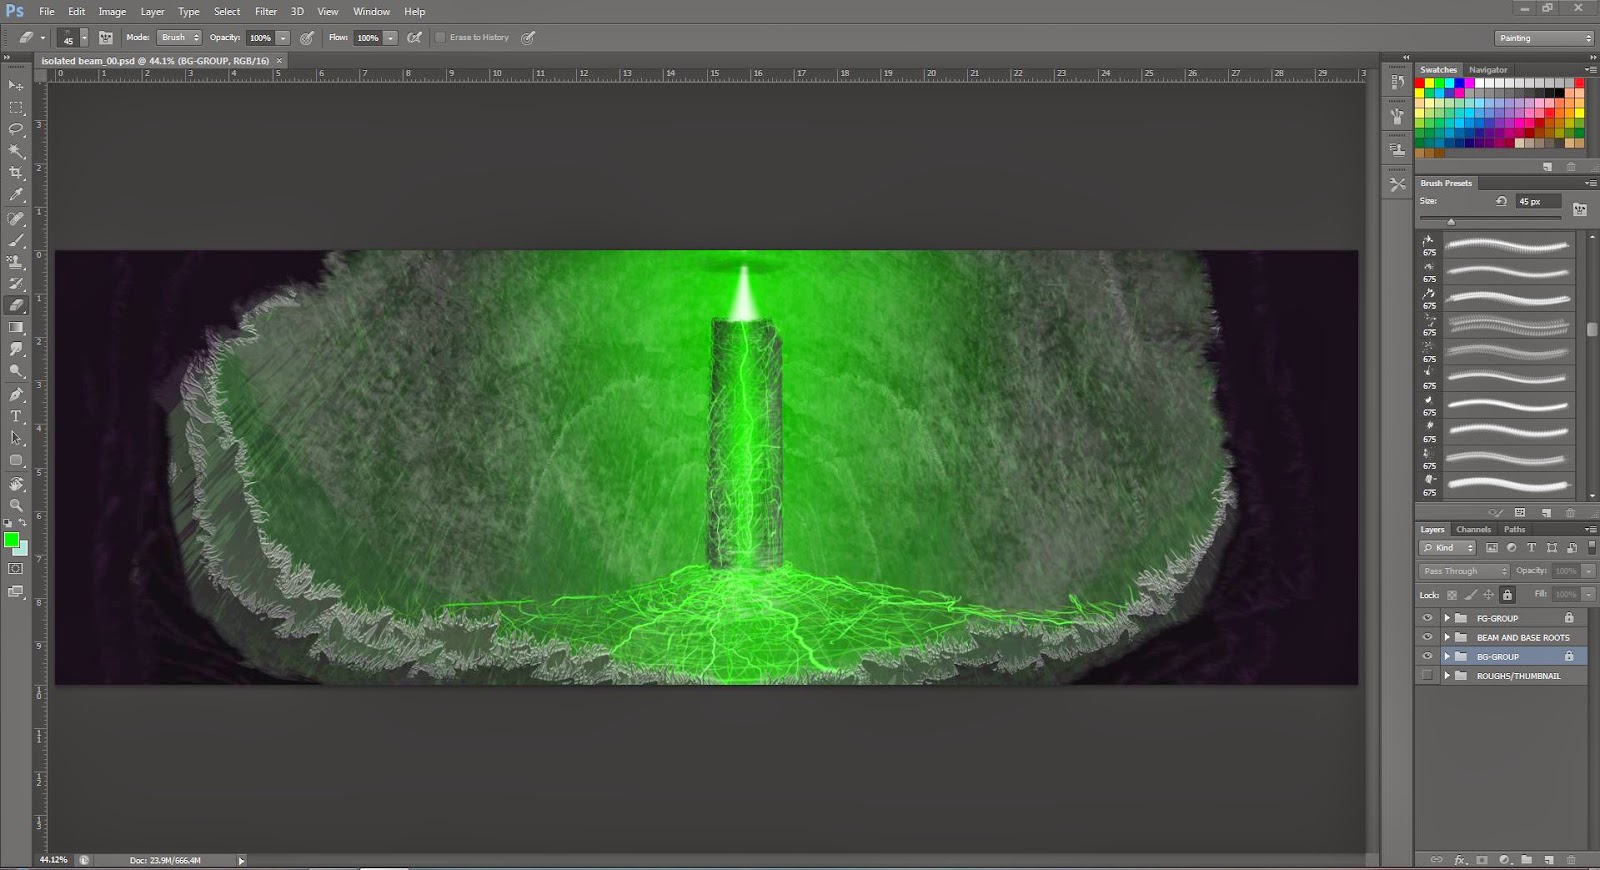
4) Add the area I have imagined the lightsource has come from above. like a sharp beam of light. 


5) I work to make the light source to feel animated and then add a few layers to make the light source closer to the shot. I add natural pillars, that were roughed out with the textures.


6) Add more roof and general room bounce light. adding a few mist layers playing with contrasts and opacity.


7) The finished result. 


MENDEL - OBLIVION - MAY 2015 ALBUM ARTWORK - DESIGN PROCESS


Mr Leon Taylor
MENDEL - OBLIVION - ALBUM ARTWORK - DESIGN PROCESS
The pencil design work before I coloured, The suit has been designed from scratch to be 100% functional and realistic. I was stoked with how the pencil linework scanned as was ready to make a real world. I had come up with the idea after listening to the title track for MENDELS - Oblivion. A brutal 63 minutes of instrumental metal. It is just excellent. 

FACEBOOK: https://www.facebook.com/Mendelian

You can buy the album from here: https://mendelian.bandcamp.com/


I throw down some textures using some of my favourite textured brushes. There is hundreds for free all over the internet. 

This helped be get down a quick overall feel of the place and texture layout.


I work on the direction of the light and how it will effect the scene.


I then start working on clouds and lightsource. constantly refining.

I then add the boiling hot liquid to the picture. In space blue is the hottest colour. 


I then start working on the deep space in the background and planets


I then start looking at the lightsource and other elements like mist, glows, shades and intense lightsource details. I also add the space person that I coloured in a separate document. I add small lightsouce to him and fit him it to the layered mist. Unfortunately I did not keep a jpeg record of this process. But will do in future projects.


THIS IS THE FINAL PNG below for MENDEL - OBLIVION debut full length Album

Thank you for checking out my visual diary of how I do things.

Mr Leon Taylor

10 Major steps (visual diary) - THE ROTTING ROOT OF DOOM - 2014 - Background concept art:


Mr Leon Taylor

Here is a visual diary of how I completed this concept art, This is something I am very passionate about and really enjoy doing. Intense background art that can feel alive. This is a series of exercises with backgrounds I have set myself. The first challenge is to complete a series of underground places that have presence.

THE ROTTING ROOT OF DOOM - 201 : Concept art/ Album artwork : Based in a place that has never seen the sun, until just at this moment. It is completely organic and has evolved for millions of years. This is a place not known to the human eye and we could not stand the atmosphere, even with protective suits.


Thumbnail
I then start cutting out the pieces I need from my thumbnail sketch 


Shape the spike and added some textures.


 Worked on the lightsource more, fine details


Add the area I have imagined the lightsource has come from and add the mist green in the far background.


I work to make the light source to feel animated and then add a few layers to make the light source closer to the shot.


The spike has been encased for million of years and has an ooze and light source too. I add those basic directions.


Start working on textures around the edges with details. I do this with textured brushes. I have a select dozen I use and have ready to go. I highly recommend this to save time picking them all the time.


Now to add some animated feeling with rocks falling from the roof, where something is entering. This part I love making the bubble bounce around and feel super action packed


I zoom out a little the blackness can make the area feel larger and more intense


Final image and PNG, I learned so much through the process of doing this. It is a subject I really enjoy doing.

Thanks for checking out my visual diary of creation.

Mr Leon Taylor